I recently did a ton of weathing for my Ellie costume and I thought I would share all I learnt on here as well!
I tried doing as much research about weathering costumes on the internet but I never really found a summary. So this is what this is!

Here is a shoelace soup…
In order to weather every part of my shoes I had to make sure the laces were not sparkly white. I brewed some black tea and let them soak for a minute or so.
Dark things become lighter.
Light things become darker.
Dark fabrics become faded over time, especially in places of high use (like buttonholes or zippers), or around the edges. Colours become more unsaturated as they age. Fade fabrics with diluted bleach, or watered down acrylic/fabric paints.
Light fabrics become darker in shades of yellows/browns. Stain light fabrics with coffee grounds, soaking it in a bath of tea, paints or dyes.
Always weather around places of high use.
If you think logically about where you weather items, it will look much more impressive! Some common places are the edges- they will usually be chipped or faded.
For example, if you have a backpack, the most used places will be the zippers, the shoulder straps and the bottom of the bag. These should be the places you focus your weathering on first!

On the left is a backpack strap weathered with watered down white paint. On the right is the same, but the edges have had white paint applied. It makes a very dramatic difference!
Darken the recesses.
The inner corners, or recesses of items will collect grime as time goes on. Fill in the corners with darker paints and shadows.
Add textures!
It’s not just colours that matter, but also the feel. Add “dirt” with some coffee grounds, rough up the fabric with sandpaper or a cheese grinder, fray fabrics with a seam ripper, nick props with a rotary tool for deep cuts or scratches.
This also applies to the way you paint. Don’t just use a paintbrush, use unconventional items such as paper towels and sponges to apply paint. This way it looks natural and not painted.

Putting it all together
I’ll do a breakdown of how I apply all this together.
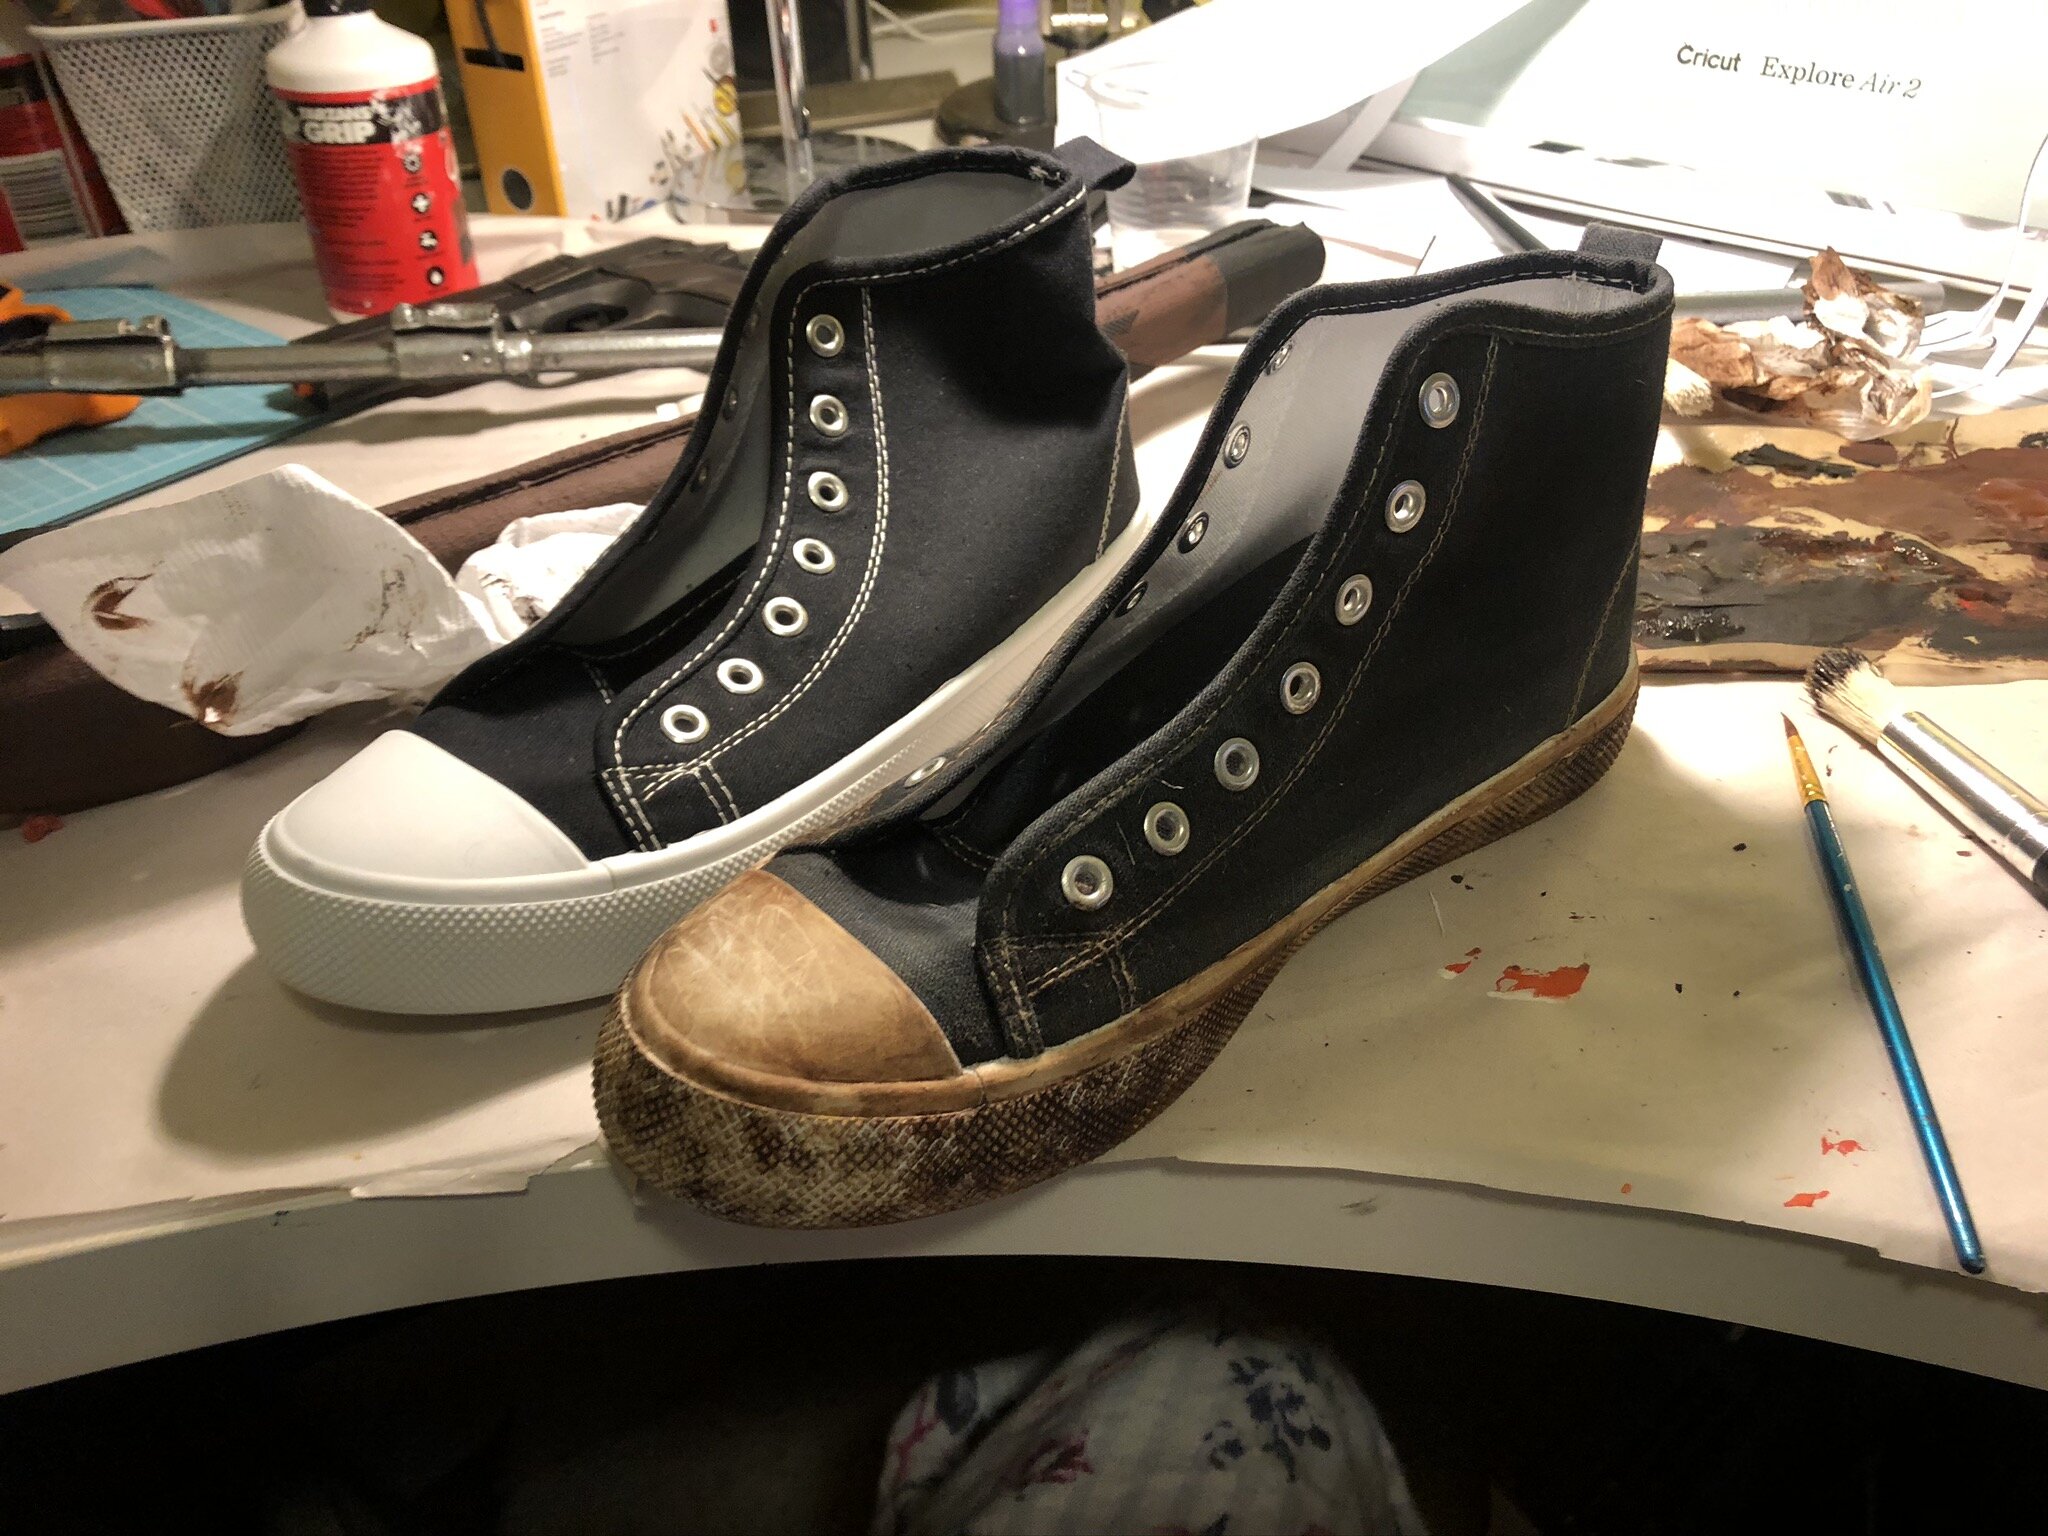
On the left is a completely new shoe. I already took the laces out because I would bye dyeing them and adding paint and dirt scuffles on it later. It’s also easier to weather the shoe without the laces in the way. Now you have access to the inner flap and the metal eyelets. Perhaps you can add a bit of red or brown to simulate rust.
I started off by adding plenty of “mud” to the white parts. I did this with acrylic paints of mustard yellow, dark browns and some reds.
Make sure to get everything! This inclues the white stitching on the shoe. I painted over it with watered down brown paint.
I also weathered the black fabric with watered down white acrylic paint. I used a paper towel to apply this, and it added some nice texture as I rubbed it across the fabric and fibres were also rubbed off.
That’s it so far! This is what think are the absolute basics of weathering. I’ll add to this if I find anything new!